Due Date: Friday 1/17 12:00pm
REQUIREMENTS
Follow the instructions below to create a blog post and submit to our section blog. This will give you an introduction to using the blog and me a little bit of an introduction to you. I’ll also create a post.
CREATE YOUR FIRST BLOG POST
You should have received an email from WordPress inviting you to join this blog as a contributor. Through WordPress you can view this blog in “reader” view same as the full studio blog, but as a Contributor (and eventually Author) on the section blog you can also view it in “editing” mode. If you’re not already in “editing mode” use the controls in the top left to switch to the “editing” mode.
For me, that looks something like this:
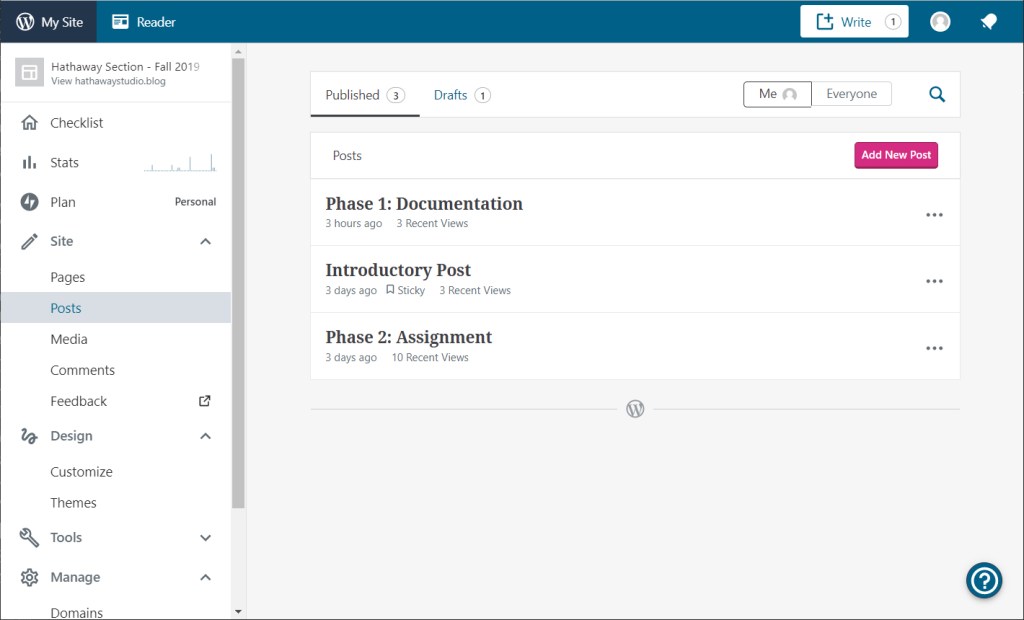
Initially you may not have access to the full range of tools but should have a screen like this where you can see existing blog posts (you can select to visit or edit if you are the author) and create a new post. Click the “Add New Post” or “Write” button and you’ll get a new screen:
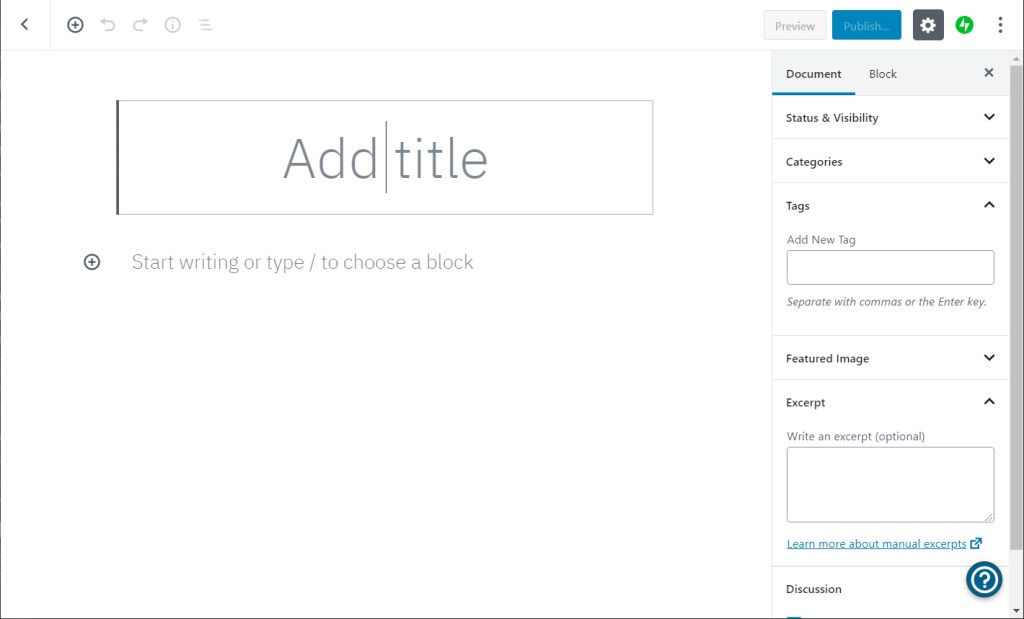
Move your cursor into the default title block and give your post a title. For the documentation of each phase your title will start with the phase, then a colon, followed by your name. For this introductory assignment we’ll call it:
Phase 0: First name Last name
Each blog post is a web page composed of “blocks”. There are many specialized blocks, but the most common are text and images. Below the title block is the next default block: you can start typing in it to use it as a text block:
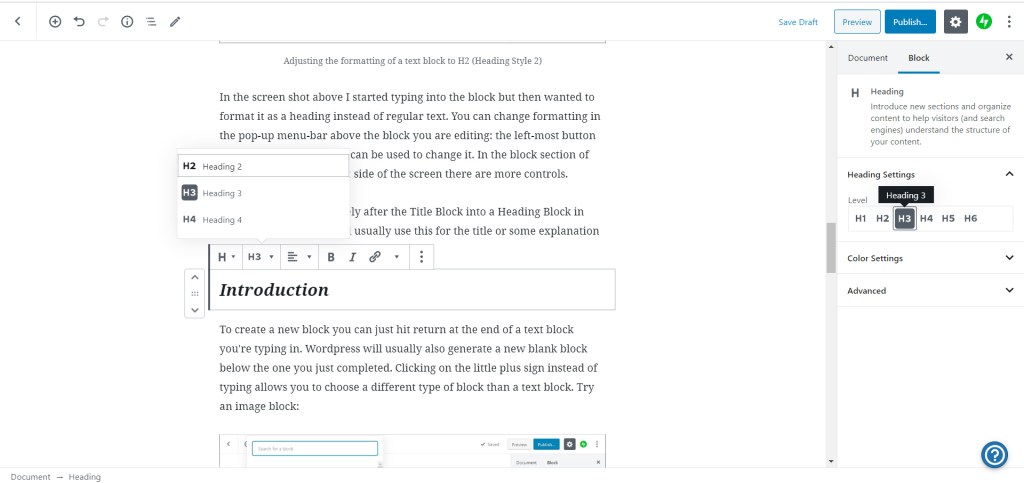
In the screen shot above I started typing into the block but then wanted to format it as a heading instead of regular text. You can change the properties of the block when it is active for editing: the menu options vary with the block type but the left-most button always shows the block type. You can use it to select the block type and for text change between different block types. In the block section of the menu-bar on the right side of the screen there are also more block-level controls.
Turn the block immediately after the Title Block into a Heading Block in italics in the H3 size. We’ll usually use this for the title or some explanation of the project phase, in this case:
Introduction
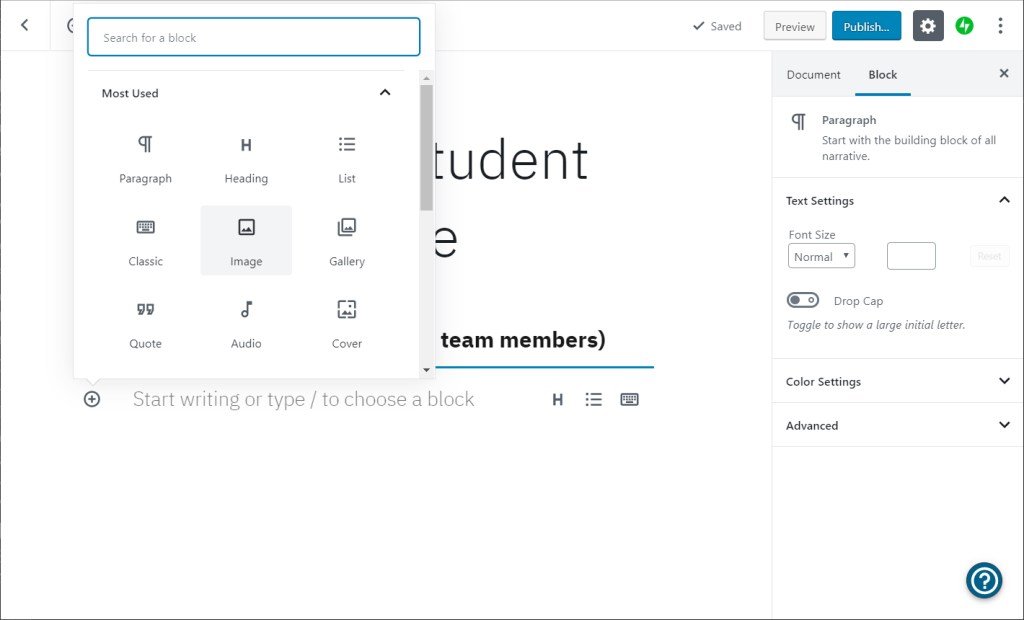
To create a new block you can just hit return at the end of a text block you’re typing in. WordPress will usually also generate a new blank block below the one you just completed. Clicking on the little plus sign instead of typing allows you to choose a different type of block than a text block.
Try an image block:
WordPress will ask you to select an image from a web url, the blog page’s library of already uploaded images, or to upload a new image. For new images it’s best to save them as RGB jpegs. (This is the default format for digital cameras and phones). Obviously you want to make sure your images are high quality and a high enough resolution for the size you are using them. (WordPress does a decent job of resizing images so I usually don’t worry about adjusting the resolution of images unless they’re very large, say over 2000 pixels across.) Once uploaded the images will be stored by the website.
Upload a headshot of yourself. If you don’t have one, enlist a friend and take a few minutes to set up good lighting and a good background. Selfies rarely work out as well. Google around and you can see different examples of poses and backgrounds. There is no absolute rule (unless you want to also use it as a passport photo) but a general guideline is head and shoulders plus non-distracting background.
The image will process and load (within a few seconds if sized properly) into the block. You can scale it or select size and location options from the menu bar that pops up above the image-block when you have it selected.
Once the headshot is in place add a brief introduction to yourself. It can be as long or short as you want but I’d like it as a minimum to include:
- Where you’re from
- Why you chose to study architecture
- An interest of yours outside of architecture
Experiment with your text and image formatting to get the hang of how the WordPress editor works. You can also rearrange blocks by moving them up and down: select the block and use the arrows or “pull” that appear at the top left of the block.
But before you’re done you’ll need to categorize and tag your post. In the image below you can see my example post is nearly complete and the menu-bar to the right is on Document, not Block (it automatically shifts to Block when you have a block active for editing).

Look for the Categories tab and expand it. I have created the categories:
- assignment
- documentation
- instructions
- precedents
Posts of your work will always be categorized as “documentation” so even though this isn’t exactly a project, check that box.
Below the Categories tab is Tags. For all of your posts I’d like you to use the tags of your name, the phase, the class, and the semester. After the first time a tag is used you won’t need to recreate it; WordPress will suggest tags for you as you start typing so these tags all exist except for your name.
Tag this post:
- ARCH 202
- 2020 spring
- Phase 0
- your First name Last name
I recommend saving drafts of your post as you are working on it, but definitely before you publish it. Use the buttons on the top right to save and then publish your post. (If you’d like to see a preview of how your post will look, use the preview button). For this first post you won’t have the ability to directly publish your post and see it on the blog; it will be submitted to me to approve and publish. But for all future posts you’ll be able to publish and edit your posts yourself. Submit your post and wait for the notification when it goes live on the blog.
